1. How to Navigate the Site Interface
Think of the 'site' as a workspace for flight planning. It not only helps to distinguish your planning activities geographically but also provides a way to organize them effectively. Every site you create is stored on the Drone Harmony server and is accessible anytime, anywhere via the Menu in the web client:

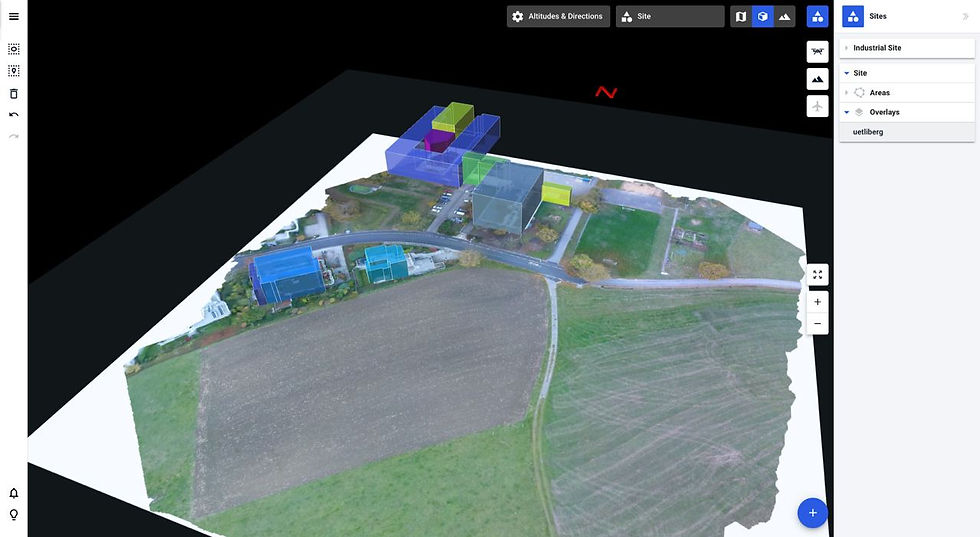
Feel free to load as many sites across the globe as you'd like. However, when creating new flight plans, you'll need to focus on one site at a time. To navigate between the loaded sites, simply double-click on the desired site on the 2D map or use the Sites panel located on the right-hand side of the screen:

In case you have many objects and missions while planning on your site you can use this button to hide some of them for convenience and easy management:

Once you are finished working on your site in our web application you can proceed to the mobile app to execute the flight.
To sync your sites between the web and mobile automatically you should save the site to the cloud first as shown in the screenshots below:


If you have saved the site to the cloud with one of the methods shown in the screenshots and you are logged into the same account in DH web and mobile apps you will be able to view your saved sites on the mobile application automatically.
Drone Harmony Mobile Application
To access your sites in the mobile app you should choose the `Site Storage` option from the main menu as shown below.

When you have already synced the state of Site Storage while connected to the Internet, a full list of synced sites will be stored locally and available to load onto your RC or mobile device for flight execution without the Internet connection.
2. Syncing Sites to the Cloud
Drone Harmony Cloud comes with a cloud service that lets you automatically store your mission planning data and makes it easily accessible across your devices and Drone Harmony applications (Web & Mobile). This feature is called the synchronization (sync) feature. The sync feature enables the following main capabilities.
Easy collaboration between data acquisition managers and pilots
Automatic backup of all mission planning states and metadata
How does the sync feature work?
Every time you save a state, either in Drone Harmony Mobile, or the Drone Harmony Web, the stored state is pushed to the cloud. The synced information is then available on all devices in you user account.

The most common uses of cloud synchronization are:
Share missions planned in Drone Harmony Web with the Drone Harmony Mobile for flight execution in the field.
Share flight missions that are adjusted in the field with other parties in the organization (either other operators, or the planner).
What exactly is stored in the cloud?
The stored elements of a Drone Harmony state are:
The scene elements (structures, points of interest)
Flight plans
Flights – the executed (flown) missions, with the trajectory and the locations of recorded medias (images / videos)
In future iterations of Drone Harmony Cloud further elements of the state and related metadata will be stored in the cloud, including flight logs, terrain data and more. Note that currently terrain data is stored separately and is not automatically synced using the synchronization function. Terrain data should be stored and managed using the corresponding menus in Drone Harmony Web.
Can I opt out of automatic synchronization?
Yes. You can turn the sync feature on and off in the web application by clicking on the top-right button and navigating to Profile -> MOBILE SYNC.
What happens if my device is offline?
The synchronization with the cloud is triggered via an internet connection every time the Load State menu is opened in Drone Harmony Mobile. If there is no internet connection available, the saved states from the last synchronization, that are stored locally on the device, will be shown in the mobile device. When the Load State menu is opened the data is synchronized across the devices.
How is the synced data secured?
All data sent from and to the Drone Harmony server is encrypted end-to-end with SSL encryption (from browser / mobile to server). For information about the data privacy, please read our privacy policy.
3. Importing Point Clouds
Accessing Point Cloud Files
The availability of point cloud data varies significantly by region. In places like Bavaria, comprehensive datasets are freely accessible for download, facilitating seamless integration into Drone Harmony workflows.
Upload to Drone Harmony
You can upload your point cloud file (a .las or .laz file) into Drone Harmony in just a few steps. The new point cloud panel in the right-hand side menu can be used (while in Map view). Already uploaded point clouds will be listed there as well. Press the Upload button, drag and drop the point cloud file(s) to upload, and provide the EPSG code of their coordinate system. After a few minutes, your point clouds should be ready to use.

Point clouds are useful to easily define areas of interest and plan missions with an intuitive point-and-click workflow within the point cloud’s visual context.
Using a point cloud to outline objects in 3D
Once uploaded, point clouds automatically appear in Drone Harmony’s 3D view in the web app. The user can then use several 3D tools from the left-hand menu to outline polygonal regions, lines, points of interest, and composite structures (such as utility masts) by simply clicking on points in the point cloud.

Planning flights with point clouds
With areas of interest outlined in the point cloud view, any automated flight mission can be generated with the standard Drone Harmony workflow. For example, a complex building can be easily outlined by clicking on its perimeter corner points in the point cloud, and a mission to inspect the roof of the building can easily be created:

Adjusting parts of missions is also easy and intuitive within the point cloud view. Waypoints can be outlined with a lasso tool and deleted, or height-adjusted to void a visible obstacle. You can even view the scene through a waypoint in the planned mission to see the content of each planned image before you leave the office:

4. Drone Harmony’s Terrain Data Sets
Drone Harmony’s new terrain interface is not just a more comfortable way of using your own models, but it also unlocks the possibility to utilize a host of high-quality country-wide data sets for drone flight planning, which Drone Harmony is providing to its Professional and Enterprise customers.
Terrain-aware flight planning with detailed terrain data (2-10m resolution) is available for:
Switzerland
Austria
France
Italy
Norway
Australia (densely populated areas and surroundings)
Drone Harmony has a new and improved way of working with digital elevation and surface models (terrains). All user uploaded terrains are now always visible and easily accessible through the terrain layer tab in the right-hand menu. From a user experience perspective, all terrains (custom or public) are now always available in the scene, just like all map tiles of the map layer. Loading a terrain is as easy as clicking on its name in the terrains tab, or zooming in on it in the map.
Where Can I Get Data for Terrain Aware Planning?
Terrain data in Drone Harmony comes from two different sources: users’ custom data and the Airbus WorldDEM data set.
In case you have custom terrain data files that you would like to use for planning terrain aware flights, you can upload this data in Geotiff (*.tif) format in Drone Harmony Web. Custom terrain data can come from several different sources: if can be bought from data providers, generated using photogrammetry software, or collected using LiDAR survey flights.


An alternative source of data that is readily available for Drone Harmony users in the web interface is the Airbus WorldDEM data source. This is global data source with a resolution of 12m (~39 feet) and accuracy of a few meters. It is ideal for performing initial terrain aware surveys or for flights at higher altitudes (above 20m / 65 feet).
Using Custom Map Overlays
Drone Harmony Web enables you to import custom maps as layers into the Drone Harmony scene. Any georeferenced image in the GeoTiff file format can be used as an Overlay in Drone Harmony.
Map overlays are a very useful tool to use in order to enhance the accuracy of maps used for mission planning. They are especially useful in areas where the standard maps are either not accurate enough, or not up to date. For example, construction sites are very dynamic environments, where structures change and equipment moves all the time. Being able to use an up to date map overlay of the construction site can significantly improve the quality of mission planning and enhance safety.
Importing and loading a new map overlay
To import a new overlay, navigate in Drone Harmony Web to the sub-menu “Overlay Storage”. In this sub-menu you will find all of the features related to uploading, loading and managing your map overlays.

To load a new overlay, you first need to upload it to the Drone Harmony Cloud. To do so use the “Upload Overlay” option, pick a file in your file system in the GeoTiff file format and give the new overlay a name. After clicking on “Process” Drone Harmony will extract the coordinate system (EPSG Code) of the georeferenced image you uploaded (if this metadata exists in the file). You can also input this manually, or change it. It is recommended to not change the coordinate system, unless you are sure that the metadata in the file is wrong. Click on “Process” again to start processing of the file into a map overlay.


Once the processing starts, you will be presented with a progress and status bar:

You do not need to wait for it to finish before closing this dialogue and continuing working. Drone Harmony will continue processing your new overlay in the background. Once the processing is complete you can load the processed overlay into you Drone Harmony scene using the “Load Overlay” option. In the “Load Overlay” menu you will find all of your processed map overlays, as well as the status of all overlays that are still processing:

Working with map overlays
Map overlays behave like most other layers in Drone Harmony Web (e.g. polygons, lines, terrains etc.). In particular, their visibility can be turned on and off in the filters menu and they can be deleted from the site (by clicking on them and selecting “delete”). Deleting an overlay does not delete it from the cloud storage (to do that you need to delete the overly in the sub-menu “Manage Overlays”).

An overlay is shown in both the map and 3D views. In the map view you can control the transparency of the overlay by clicking on it and adjusting the slider “Change Transparency”. Reducing the transparency can, for example, help you understand how the custom map is related to the original map underneath.

Comentarios