Accessing Point Cloud Files
The availability of point cloud data varies significantly by region. In places like Bavaria, comprehensive datasets are freely accessible for download, facilitating seamless integration into Drone Harmony workflows.
Upload to Drone Harmony
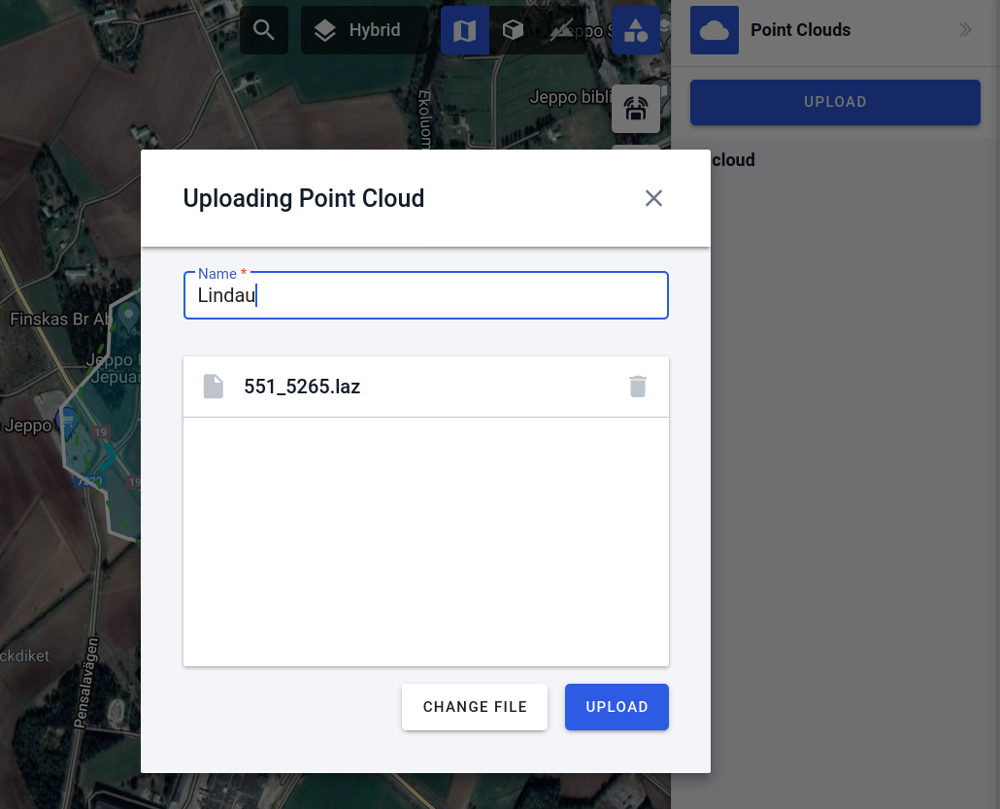
You can upload your point cloud file (a .las or .laz file) into Drone Harmony in just a few steps. The new point cloud panel in the right-hand side menu can be used (while in Map view). Already uploaded point clouds will be listed there as well. Press the Upload button, drag and drop the point cloud file(s) to upload, and provide the EPSG code of their coordinate system. After a few minutes, your point clouds should be ready to use.
Point clouds are useful to easily define areas of interest and plan missions with an intuitive point-and-click workflow within the point cloud’s visual context.
Using a point cloud to outline objects in 3D
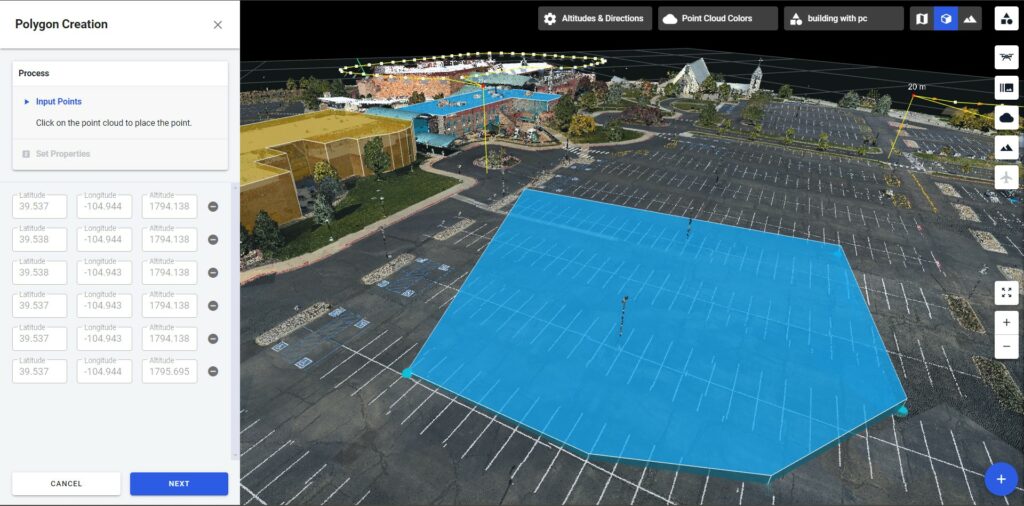
Once uploaded, point clouds automatically appear in Drone Harmony’s 3D view in the web app. The user can then use several 3D tools from the left-hand menu to outline polygonal regions, lines, points of interest, and composite structures (such as utility masts) by simply clicking on points in the point cloud.
Planning flights with point clouds
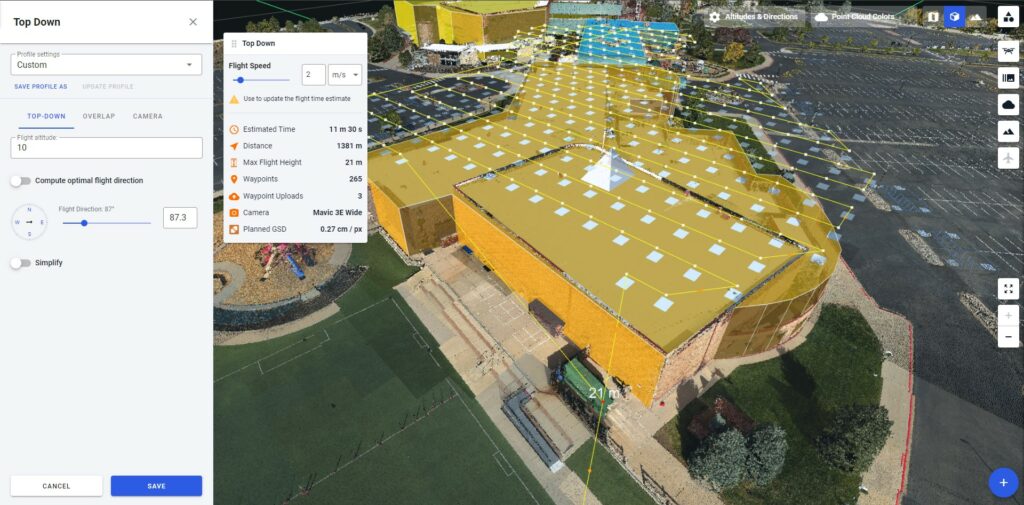
With areas of interest outlined in the point cloud view, any automated flight mission can be generated with the standard Drone Harmony workflow. For example, a complex building can be easily outlined by clicking on its perimeter corner points in the point cloud, and a mission to inspect the roof of the building can easily be created:
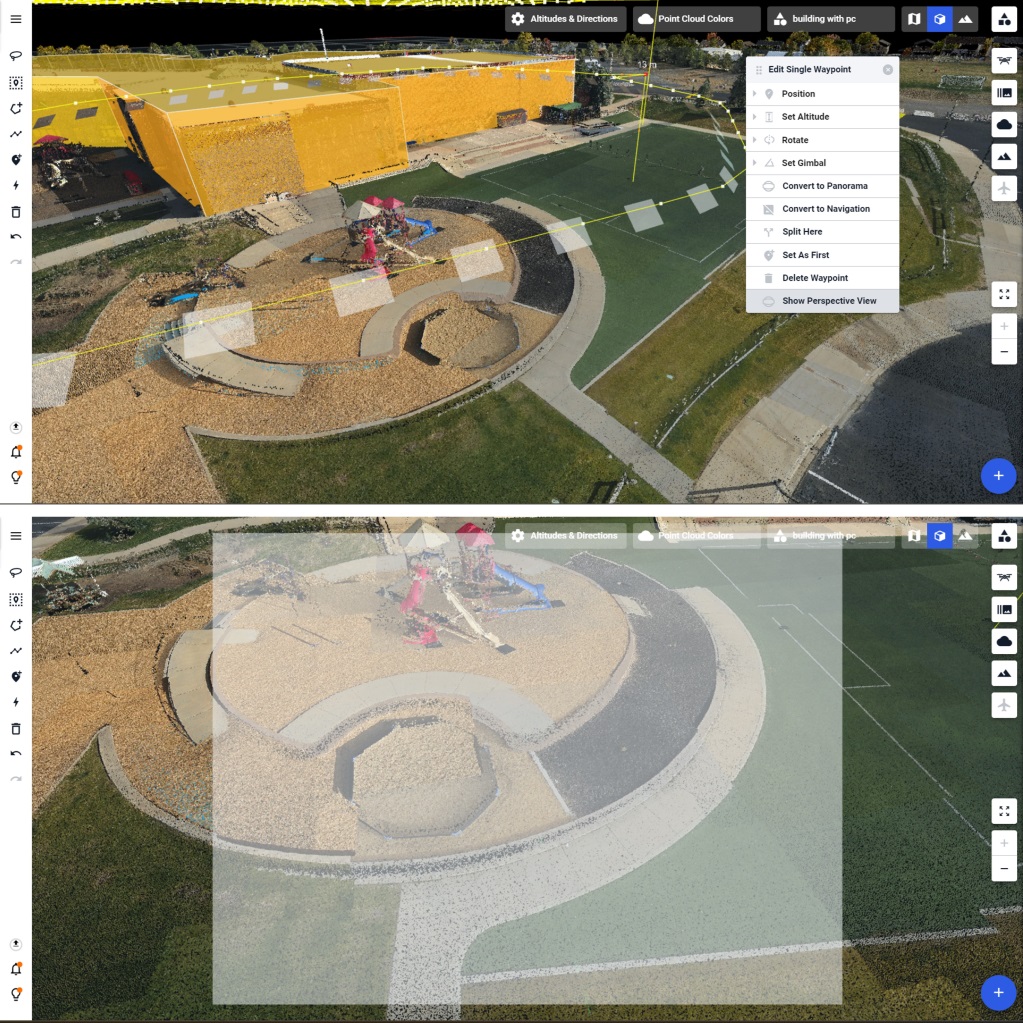
Adjusting parts of missions is also easy and intuitive within the point cloud view. Waypoints can be outlined with a lasso tool and deleted, or height-adjusted to void a visible obstacle. You can even view the scene through a waypoint in the planned mission to see the content of each planned image before you leave the office: