The Power Scanner is a state-of-the-art software that streamlines the process of inspecting electric transmission towers and poles using drones. Its advanced algorithms and seamless integration with drone hardware significantly reduce inspection time, increase accuracy, and enhance overall efficiency. This user guide will walk you through the steps necessary to operate the Power Scanner software effectively.
Getting Started
System Requirements
Hardware:
The Power Scanner mobile application is compatible with all DJI enterprise remote controllers.
The Power Scanner is also available as a web application that can be accessed through any browser on your desktop or laptop.
Internet Connection:
A broadband connection is recommended for updates, flight authorization/unlocking, and cloud synchronization.
Licensing and Activation
If you have not yet received your license key from our sales team, please contact our sales team through this contact form.
To activate your license, log in to the Power Scanner web application and enter your license key in your dashboard. Create a new one if you don’t have an account yet.
Installing Power Scanner
Follow these steps to install the Power Scanner software:
- Download the Android installation file (apk) onto your DJI remote controller: powerscanner.droneharmony.com
- Run the installer, log in with your licensed account details, and follow the on-screen prompts to complete the installation.
Preparing for Drone Inspection Flights
Importing Line, Tower, and Terrain Data
Power Scanner utilizes the data you provide to generate flight plans for inspection flights automatically. You can load various data formats in the Power Scanner web application:
- Tower, insulator, and cable data (PLS-CADD *.dxf, PLS-CADD *.kml, *.csv)
- LiDAR Point Clouds (*.xyz, *.las, *.laz)
- Digital elevation models (*.Geotiff) – Note: Power Scanner already provides some elevation data.
Checking Flight Restrictions and Obtaining Flight Authorization
Use the integrated airspace information in the Power Scanner web application to check for potential flight restrictions at the inspection site. We recommend consulting your local authorities for additional restrictions that may not be listed. If restrictions are present, you may need to obtain flight authorization from DJI by unlocking a Geozone with a DJI certificate. Learn more about this process on DJI’s Fly Safe website.
Performing the drone inspection flight
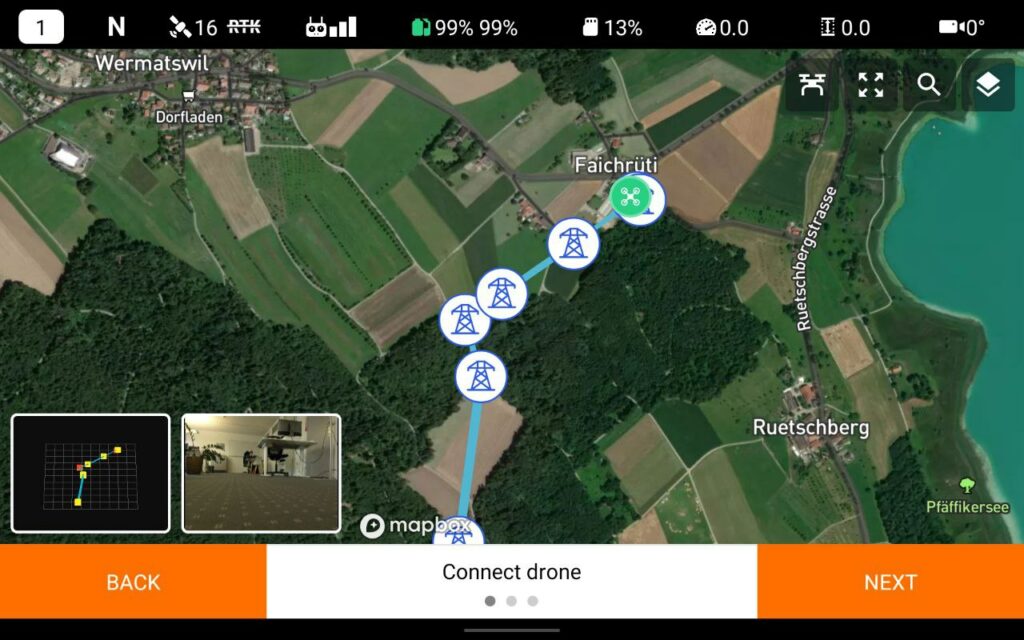
Connecting the drone
To successfully connect Power Scanner to your drone, follow these steps:
- Power on the drone.
- Power on the remote controller (RC).
- Close the DJI application (usually DJI Pilot).
- Open the Drone Harmony Power Scanner app and press “Start” to initiate the inspection workflow.
- A window displays the drone connection status; wait until all indicators turn green.
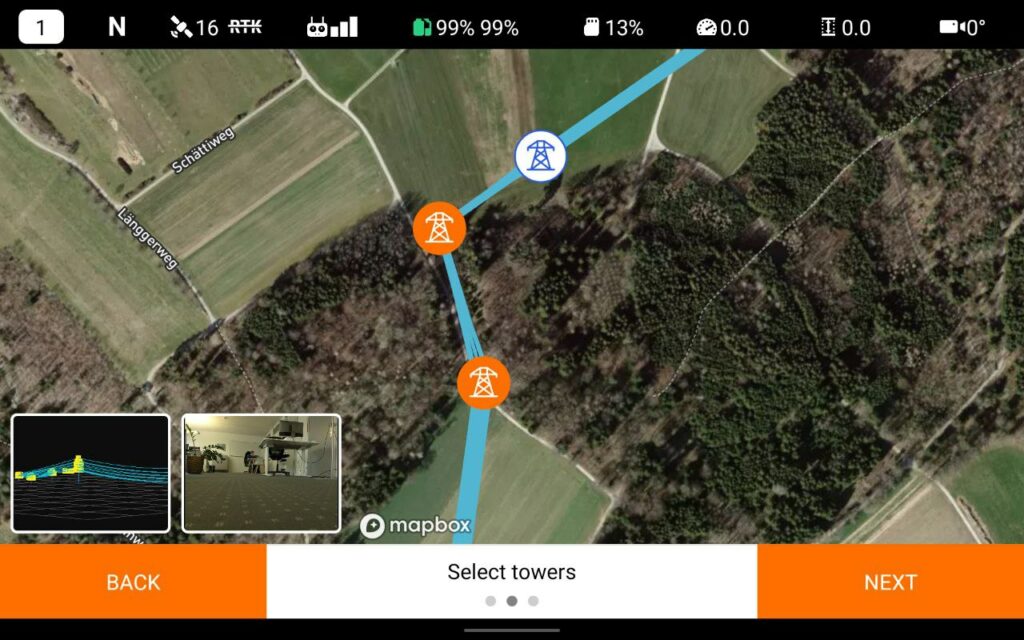
Selecting the towers to inspect
After connecting with the drone, you can select the towers you wish to inspect. Follow these steps:
- Tap on the towers you want to inspect; the selected towers will turn orange.
- Review your selection and make any necessary adjustments.
- Proceed to examine the automatically generated flight plan for the inspection.
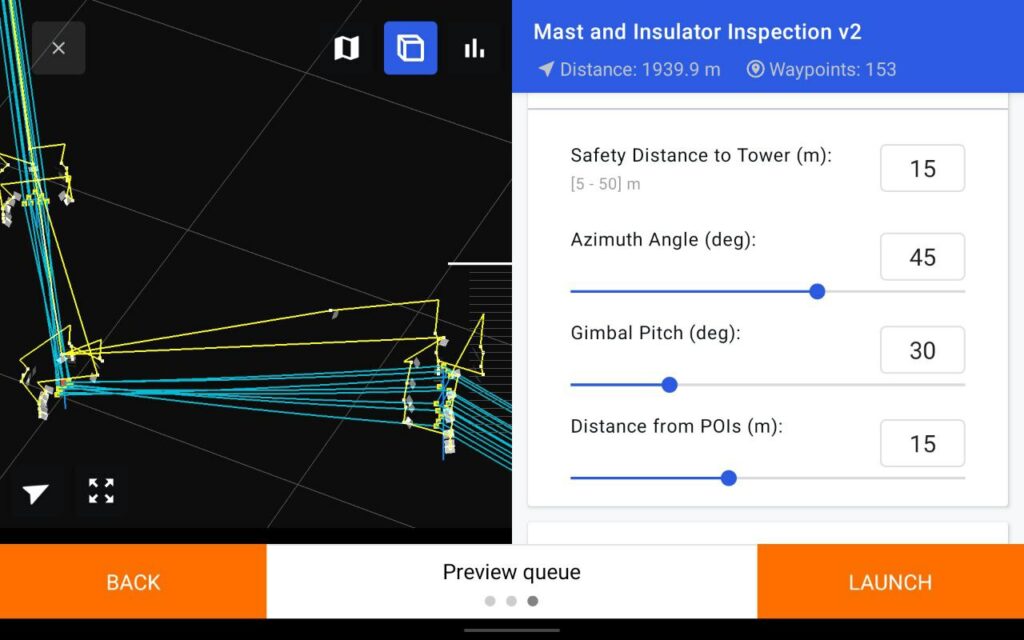
Previewing & finetuning the flight plan
Power Scanner shows you the flight plan in a 3D preview. The generated flight plan will usually perfectly collect data for your inspection task. But you may finetune advanced plan & launch parameters such as mission speed or capture angles or distances.
Tower Calibration
Calibrating for the Tower Height
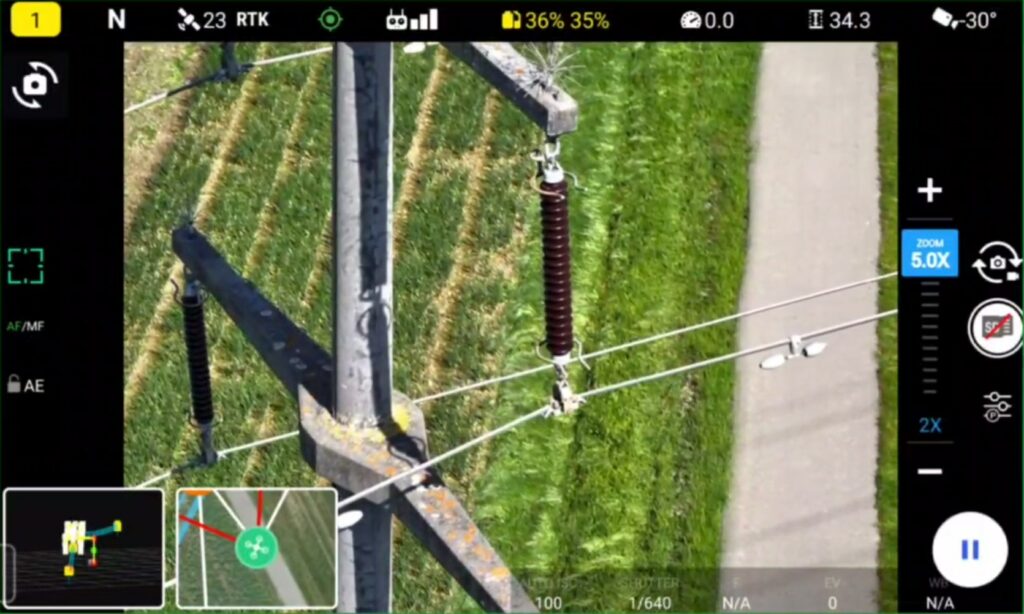
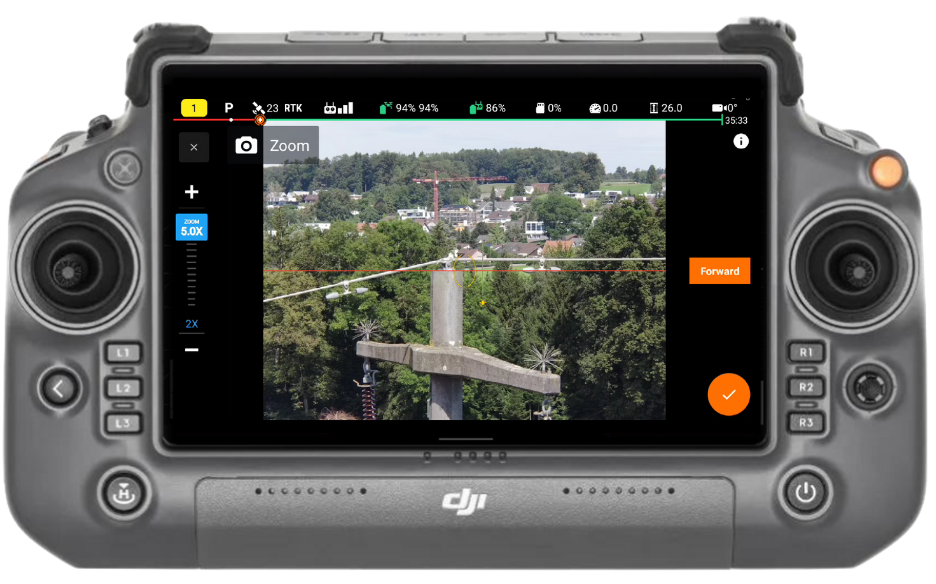
After you start the mission, you will be asked to fly to a tower next to you to calibrate the drone altitude with the tower altitude. This is a necessary step to potential inaccuracies in the provisioned data or the drone positioning. Once you reach a position next to the tower and look at the top, confirm the calibration by pressing the checkmark.
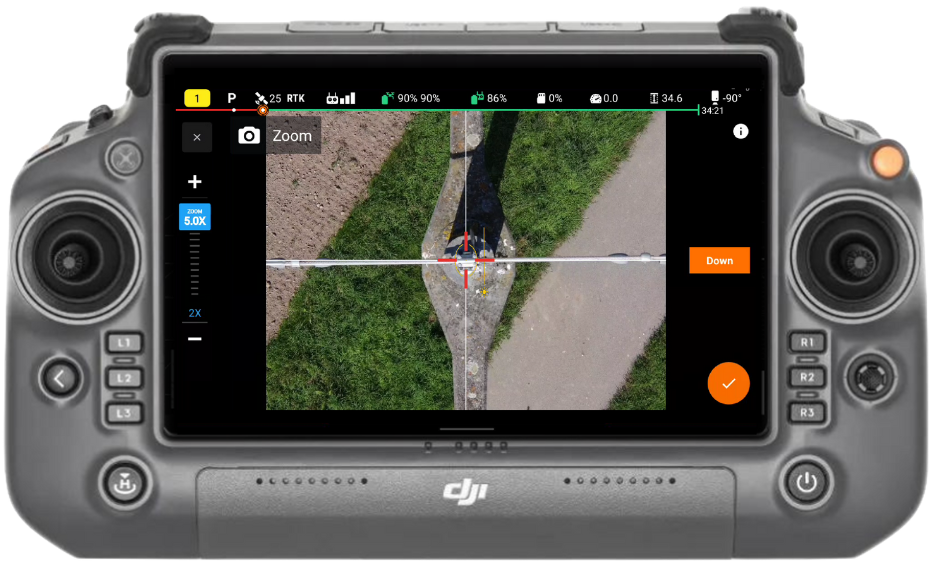
Calibrating for the lat/lon Tower Position
After you complete the tower height calibration, you will be asked to fly above the tower. Once there, face the gimbal down (NADIR, -90°; you may use the “downward” button to do it quickly) and align with the tower center once again. After successful alignment, confirm this calibration step by pressing the checkmark.
Launch & automatic flight execution
After the last calibration, Power Scanner will launch the automated flight to inspect the towers. You should monitor the mission progress, and you are always able to pause and stop the mission. You may also immediately abort the automatic flight and take full control of the drone by switching the DJI flight mode on your remote controller from P to any other mode.