This document describes the simple workflow of capturing accurate asset data using the Drone Harmony Asset Scanner.
Asset Scanner is a part of the Android mobile application combined with the Drone Harmony Web App. Some steps of the planning workflow can be done in both apps. In such cases, the workflow in both apps is presented below.
The app is designed to allow a good combination of flexibility and simplicity. Drone Harmony supports customers and partners with training. If you are interested, please reach out to sales@droneharmony.com
Installation and License
Asset Scanner requires a Drone Harmony Enterprise license to use. If you still do not have one, please get in touch with sales@droneharmony.com.
To install the app, download the installation file (*.apk) from this link: https://droneharmony.com/apks/dh-djisc-2.7.1.apk
and install it on your mobile device (or DJI RC Pro, e.g., Smart Controller).
The web app is accessible in your browser through the usual link: app.droneharmony.com
Step 1: Data import
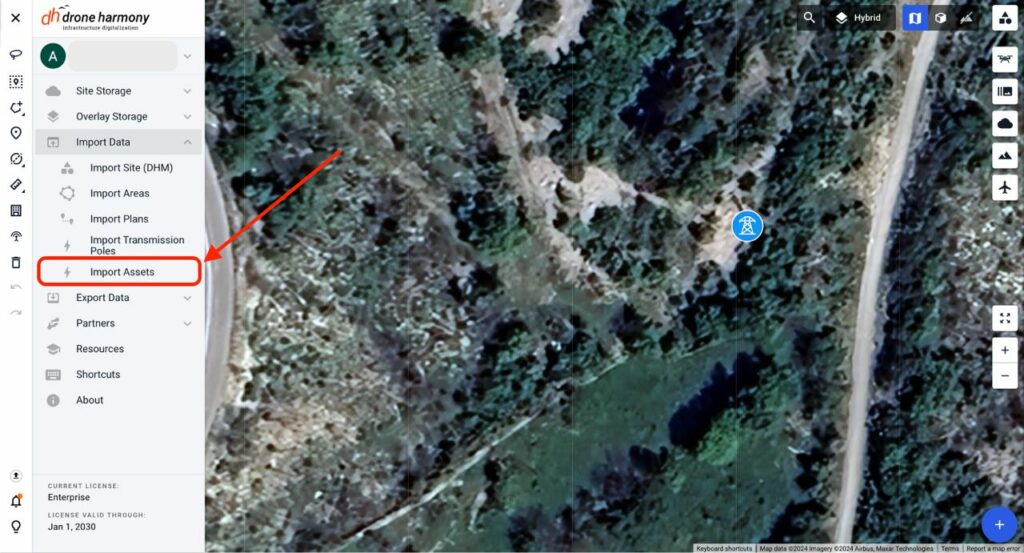
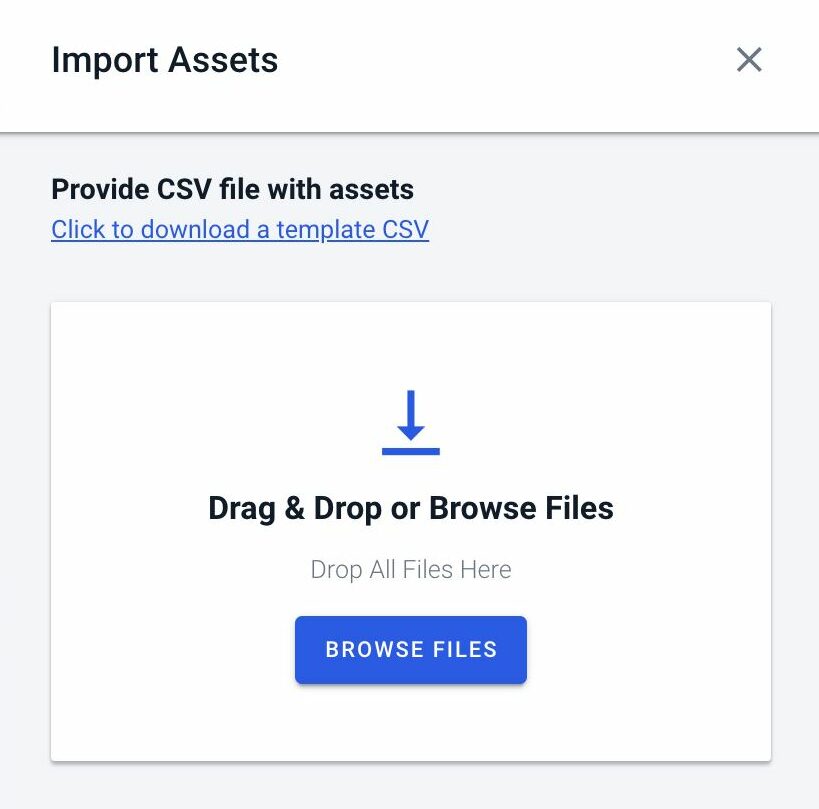
You should use the web app to import data with accurate locations of your assets in CSV format before the flight planning and execution stage.
To create and edit a CSV file with locations of assets you can use a sample that we provide in the import menu or just use the text editor. In case you use a text editor, every value should be separated with commas, and the header row must include Site, ID, Latitude, and Longitude.
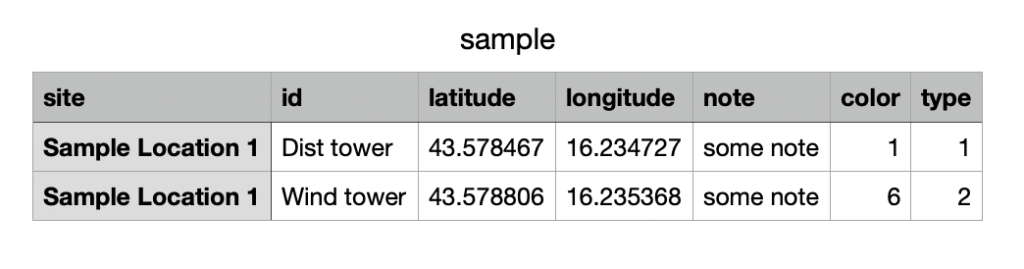
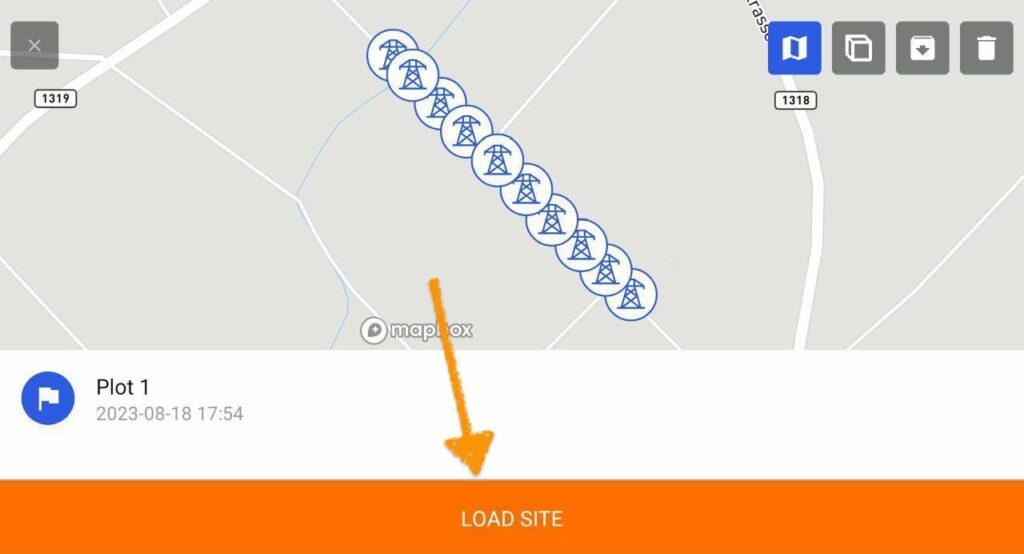
When importing a big site with numerous assets the software will separate it in the map view according to the numbering that you will provide the smaller plots (groups of assets) as shown in screenshot 1, in the site column.

Step 2: Site load in mobile app
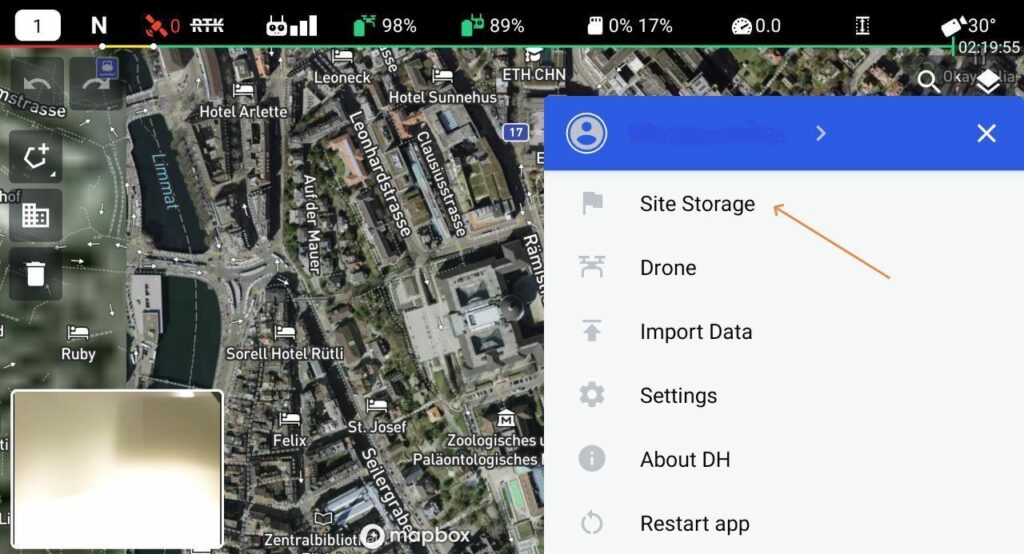
Once you import data in the web app you should proceed to the mobile app with the same account that you have used for login in the web app. Turning on the cloud sync on the setup of the app or later in settings is essential to automatically load your imported data as a site from the web app.
Here are some screenshots that will point you on how to load the site on mobile, to begin with the flight execution stage:
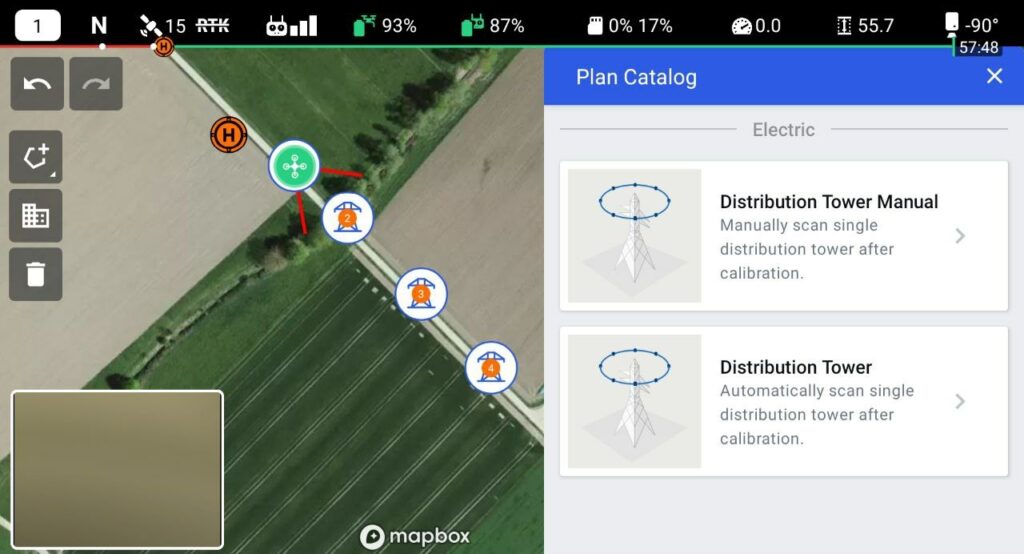
Step 3: Flight planning
Once you successfully loaded the site in the mobile app you should hit the plus sign to choose between Automatic or Manual flight plan creation to proceed with the inspection. As of now, there are only two options, but we are going to add a variety of flight plans shortly, including customizable ones.
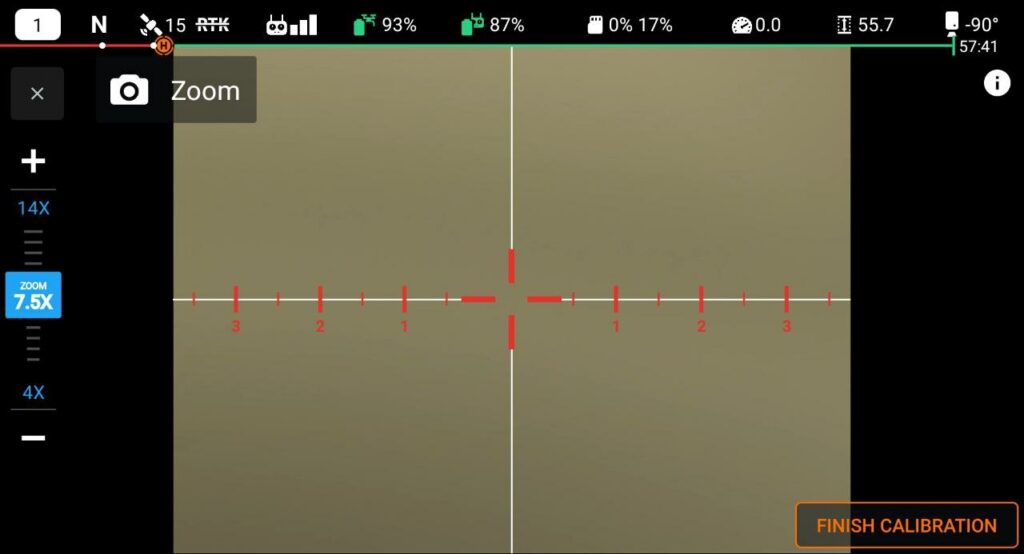
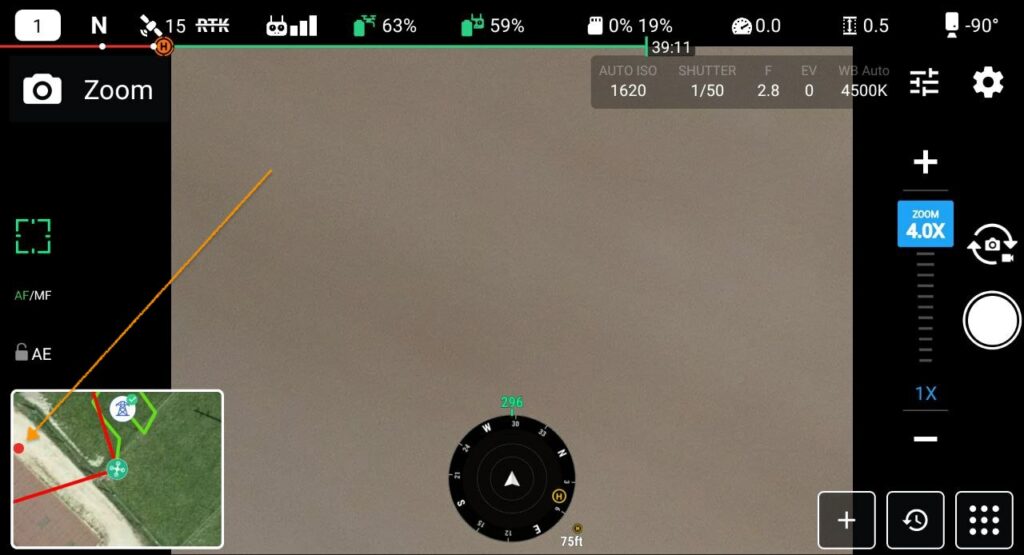
Step 4: Calibration
Calibration will allow you to correct the position of the asset and align it with the position of a tower on the map.
To calibrate the position you should visually put the top of the asset in the center of the red cross with a camera gimbal -90 degrees. The asset`s crossbar should be in the center and aligned to the red horizontal scale visible in the FPV view. Finish the calibration once the asset is well centered in the red cross, and proceed to the flight execution stage.
Step 5: Flight execution
The software will number the assets dynamically based on progress for your convenience and also mark with a green check those already inspected as shown in the screenshot.
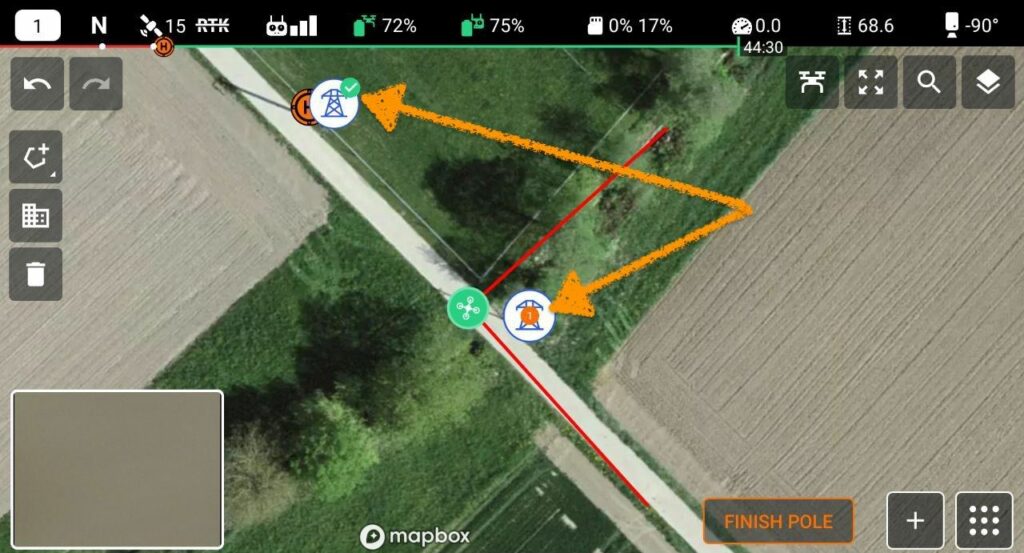
When an inspection of a single asset is done you should press the `finish asset` button to proceed with the inspection of the next one if you have chosen a manual flight plan.
In case you have used the automatic flight plan you can take additional photos in manual flight mode before pressing the `finish asset` button.
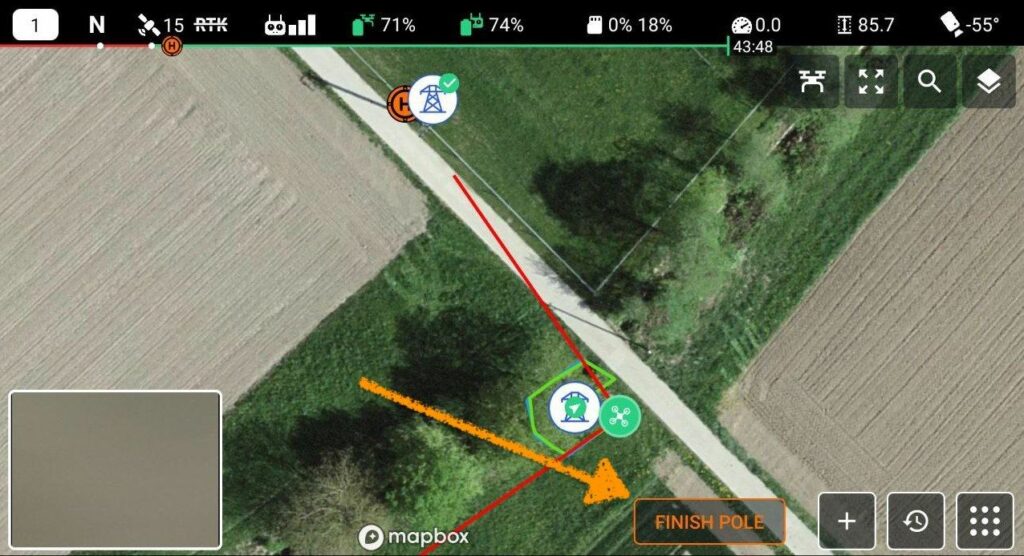
Once you have finished with the single asset completely, the red point on a mini-map in the FPV view will show you the flight direction to reach the next nearest asset so you should not switch to the map view as it is time-consuming.
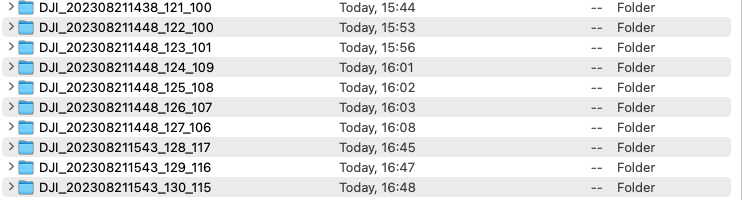
Step 6: Generation of the report
At the end of the inspection process, you will be able to generate a full daily report on the work done with the information on each scanned asset (inspection status, note from pilot), drone, pilot, and time the inspection was made. To achieve this you should just go to site storage to sync the daily scanned data to the cloud.

All uploaded images would be stored in folders according to the asset name and date as shown in the screenshot below.
For technical questions, please contact support@droneharmony.com
For sales/business questions, please contact sales@droneharmony.com


